Great punchboards – how to create them?
The fact that punchboards can be used in so many ways and take so many different shapes, is also what can make it a bit more difficult to prepare the files for. Similar to cards, one must take care to leave enough bleed and margin. But unlike cards, you also have to consider things such as folding lines (for game boards) or optimal token placement. Then there are special margin requirements, dielines, thickness of the material to keep in mind.. All in all, quite a bit!
Fortunately these are all things that we at Boda Games have a lot of experience with and will gladly help you with . By optimising token layout, we can reduce the amount of cardboard and space needed in the game box, which is a win-win situation for everyone!
General requirements
In order for a punchboard to be able to fit inside the game box, it should be at least 15mm smaller than the top part of the game box in both width and height. Smaller than that is of course always possible, but bigger than that and it will be difficult to get in and out of the game box easily.
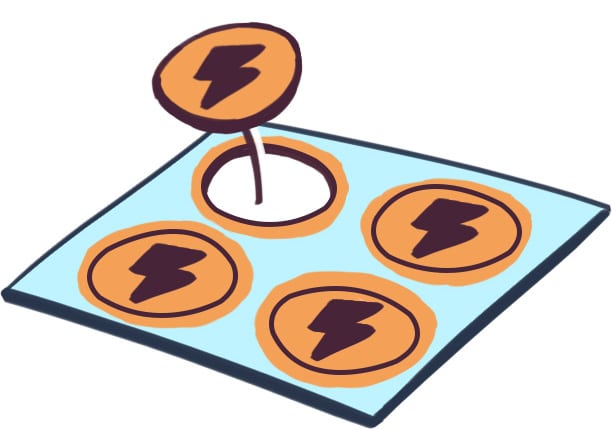
For tokens, generally the smallest a token can be is 8mm x 8mm, although it depends on the shape of the token. For uniquely shaped tokens, as a rule of thumb individual edges / protruding shapes of the token need to be at least 3mm long. If not, then it will not be possible to ensure an accurate cut from the molds and a consistent shape on each token. Furthermore, keep in mind that tokens will be slightly rounded at the edges when seen from the top. This is due to the way that you punch the shape of the token into the cardboard, allowing players to push them out without tearing the paper.
When you have multiple sheets of tokens or other items that use the same die-cut, make sure to label each of them accordingly. This helps make sure that there are no mix ups during production and packing. We can put the label anywhere on the outside of the board. Later during production we will cut it off and throw it away.
As said previously, it is important to design a punchboard in such a way that you make use of all the space it offers and waste as little paper as possible. However, at the same time there needs to be enough space between each individual item on the punchboard. Each item on the punchboard needs to have enough bleed and margin in all directions for a perfect result. When you need more than one punchboard, rather than thinking of the most efficient layout for each individual punchboard, it is better to think of them as a whole.
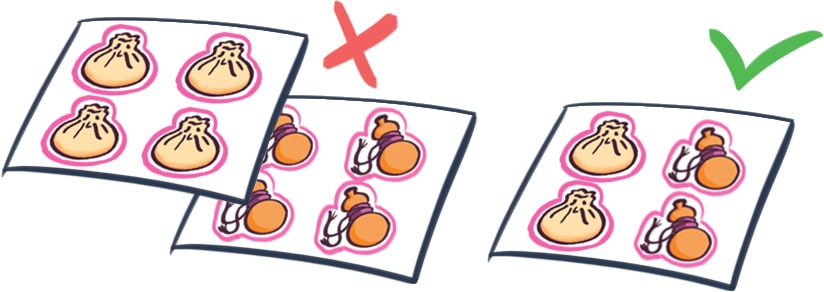
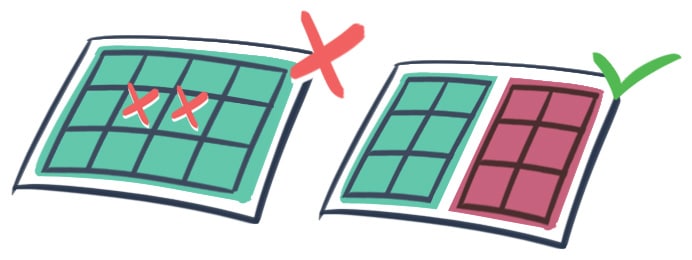
Due to the cost incurred for each individual diecut, in some cases it is better to design the punchboard in such a way that you only need 1 diecut mold. This helps save on the molding costs. For example, say you need 12 round tokens and 24 square tokens. You are better off making 1 punchboard with 4 round tokens and 8 square tokens and printing 3 punchboards. Instead of making 1 punchboard with only round tokens and 1 with only square tokens.
Punchboards Bleed and Margin
A quick review recap from our post about cards regarding bleed and margin. What is bleed and what is margin? Bleed and margin are there to make sure that after printing when the cards are being cut, there is enough printed that extends to the edge of the page.
The thing is, there is a very minimal amount of movement that may occur when printing with a press. Thus, if your artwork fits exactly and the press moves a millimeter, then the whole artwork moves 1 mm in a given direction. Then, when we start cutting, part of the card won’t have any artwork. Furthermore, there is also a small degree of movement that can occur when cutting the cards. So that means in both printing and cutting, we wanna make sure that even if a small amount of movement occurs, the artwork and the printing are coming out the right way.
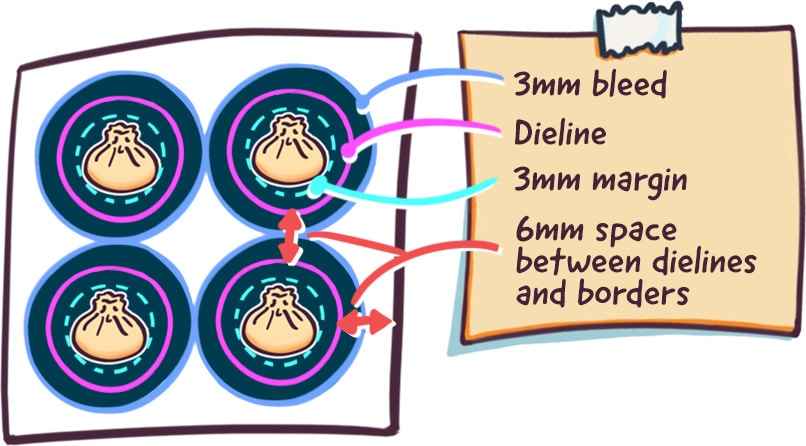
For a punchboard, you should leave a minimum of 6mm between any dielines. This can be dielines between different tokens, or 6mm spacing between a token and the dieline of the board itself. Then, each token should have 3mm of bleed outside the adhering dieline, and 3mm of margin between the dieline and the artwork.
So what does this mean? Don’t place any artwork or text between the dieline and the first 3mm away from the dieline. If you do, then it will be obvious if the cut moves 1mm or so because it will directly show on the artwork. A neutral background that is less noticeable when the cut moves slightly is therefore the preferred choice to fill up this area. Besides the individual tokens, the entire board as a whole also needs to have 3mm bleed and 3mm margin. The dieline should have the same size as discussed and specified in the quotation.
One space-saving alternative is to create shared dielines. There are some limitations to what kind of shapes can use shared dielines. Straight lines, square shapes, rectangular shapes and such work well with shared dielines. But complicated shapes (rounded, very pointed) are usually not very suitable. If you are considering using shared dielines, please consult your account manager about the feasibility.
Further requirements for shared dielines: two items that are sharing a dieline have the same content in their margins. Also, that the token needs to have a minimum of 1 touching point with the physical punchboard. This means you cannot have a token that shares dielines on all 4 sides (in the case of a square token); 1 side must be attached to the “main” punchboard.
Punchboards Files Preparation
For dieline files, please take care to make separate files for each dieline. You can either save them as separate PDF files, or as individual spot layers in the art file. However, don’t include them in the regular art file layers. The reason is that they will be used separately to create the diecut mold. Therefore, they need to be separated from the regular art file.
When creating a layout for the punchboard, keep in mind the following. The backside needs to be an exact mirrored shape of the frontside. Of course the artwork can be different. But the placement of the tokens and the layout will remain the same and therefore need to mirrored.

Double layered punchboards sounds very fancy and are in fact very nice. But in terms of production they can simple be regarded as two layers that are glued together. Or more, such as the 3 layer punchboard in the Boda Games sample box. This means that on each layer, you can print artwork.. And also make cutouts and holes as much as you like. However, when putting artwork below a cutout portion, take extra care! Make sure that the artwork will fit within the cutout. When when the alignment moves slightly within the margins of production.
Final checklist:
- 3mm bleed on all punchboards
- 3mm margins and 3mm bleed
- CMYK color mode
- images at 300+ppi
- black text: pure black
- dielines in a different file
Sorry, the comment form is closed at this time.